Face Recognition
In this guide, we will outline the procedure to establish an identity verification process. This process authenticates a user through our facial recognition technology by comparing the visual similarities between a pre-existing selfie and a new photo or video that the user uploads to our system.
Steps 1 and 2, which involve enrolling the face and successfully validating it via face-recognition, can be skipped if the account_id already has an associated and accepted face.
1. Create an enrollment
We link the user's face, which we already possess, to the facial recognition system using the enrollment API. This should be performed with the face-recognition enrollment type. Here is an example illustrating how to create such an enrollment:
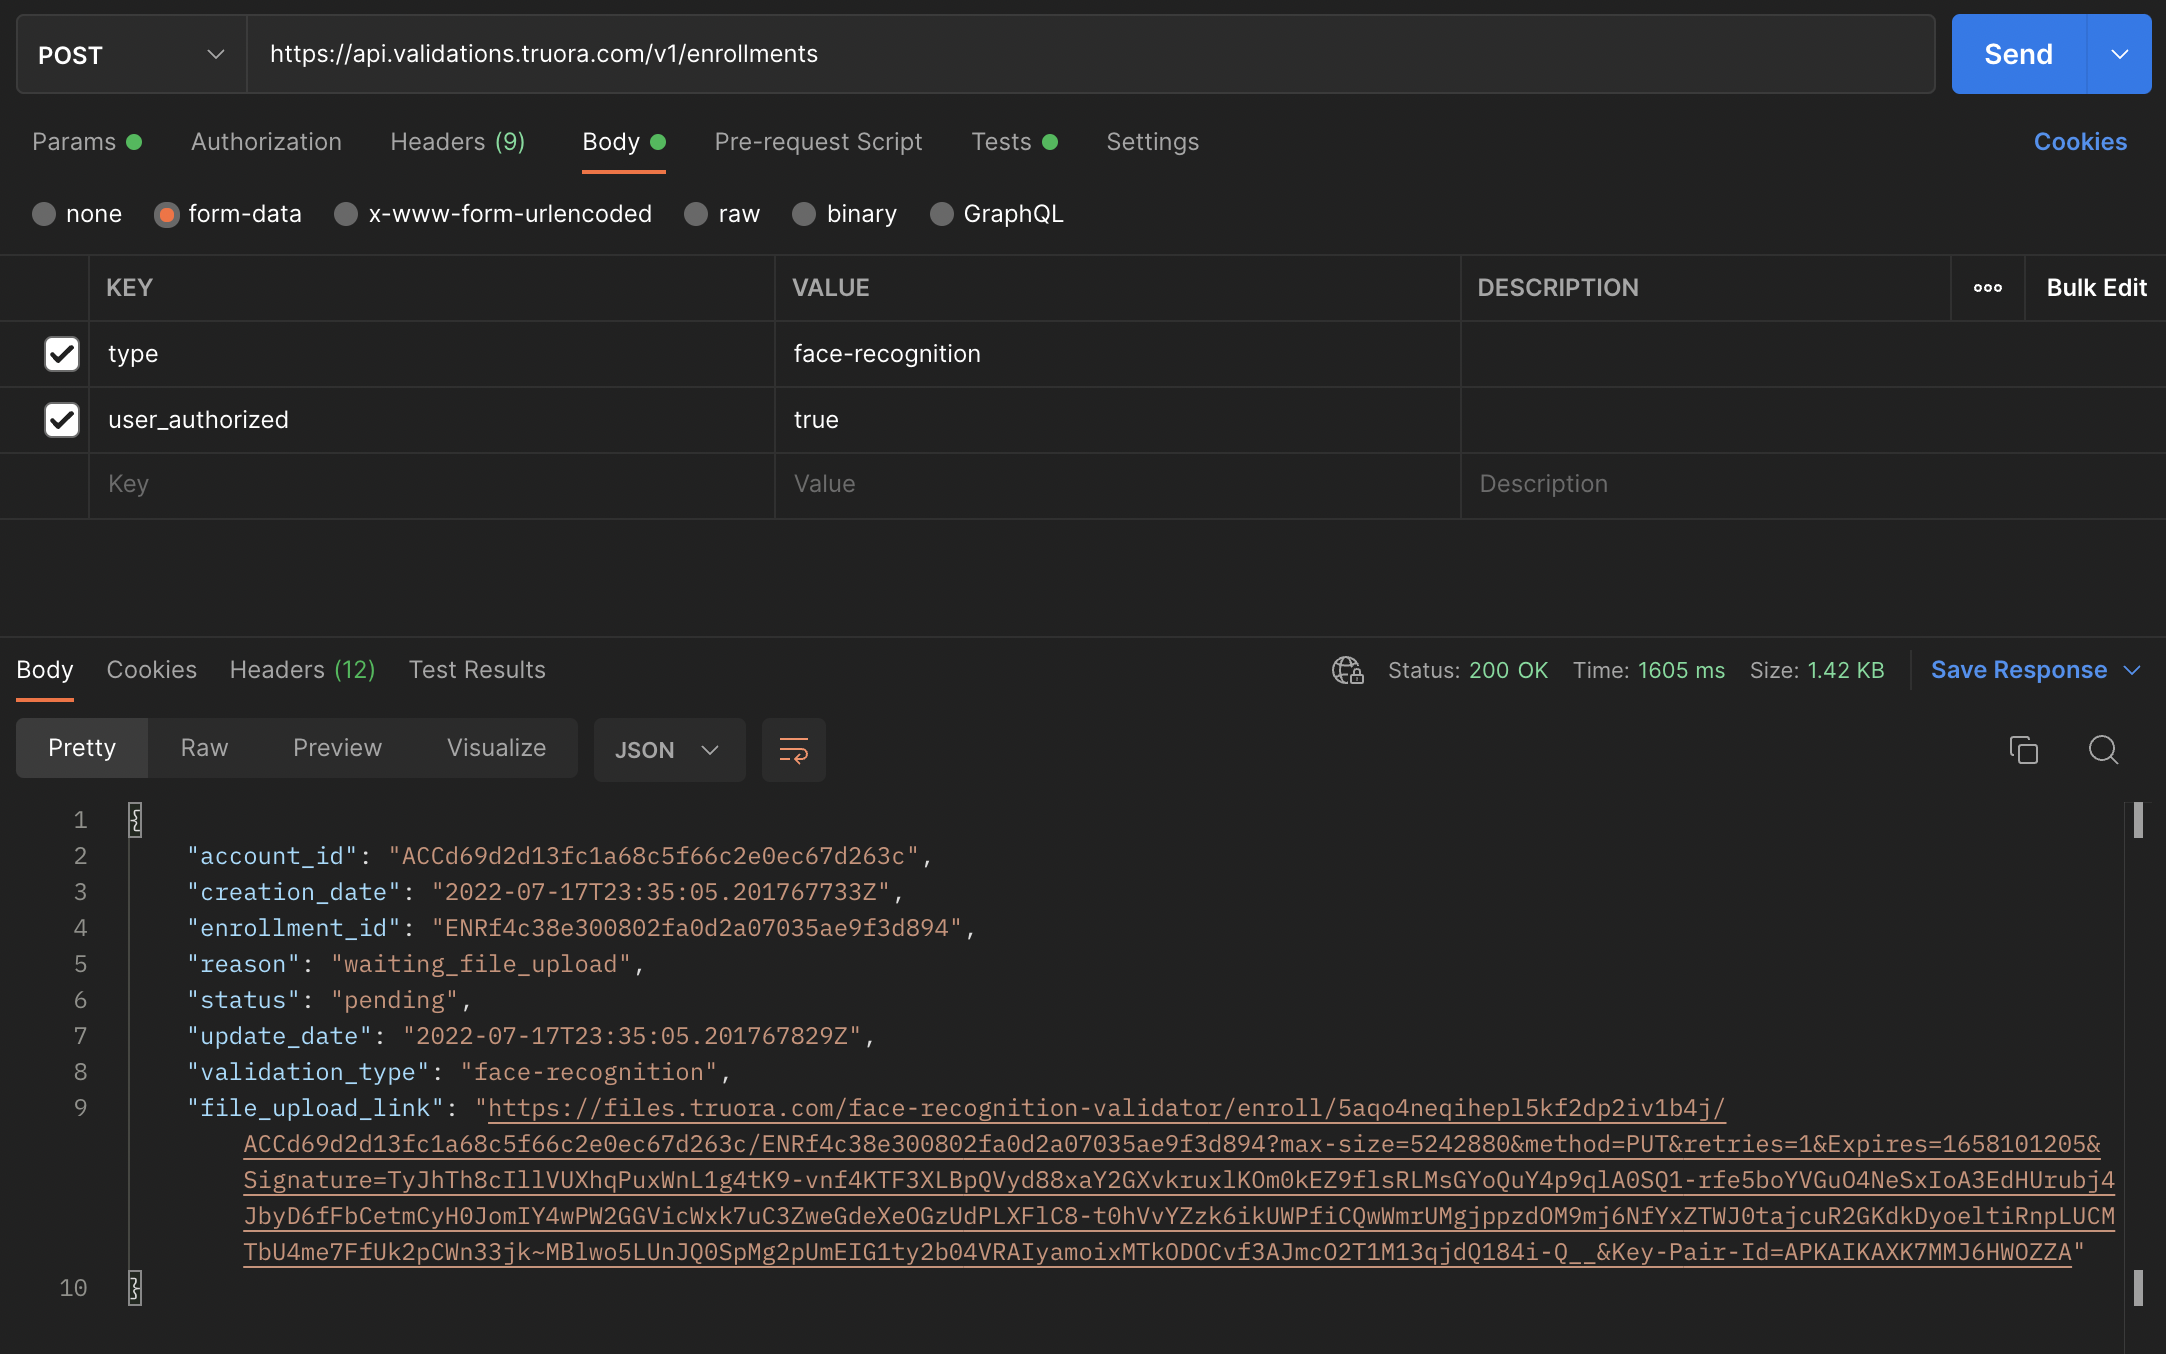
Important: This request will be unsuccessful if the account already has a face enrolled.
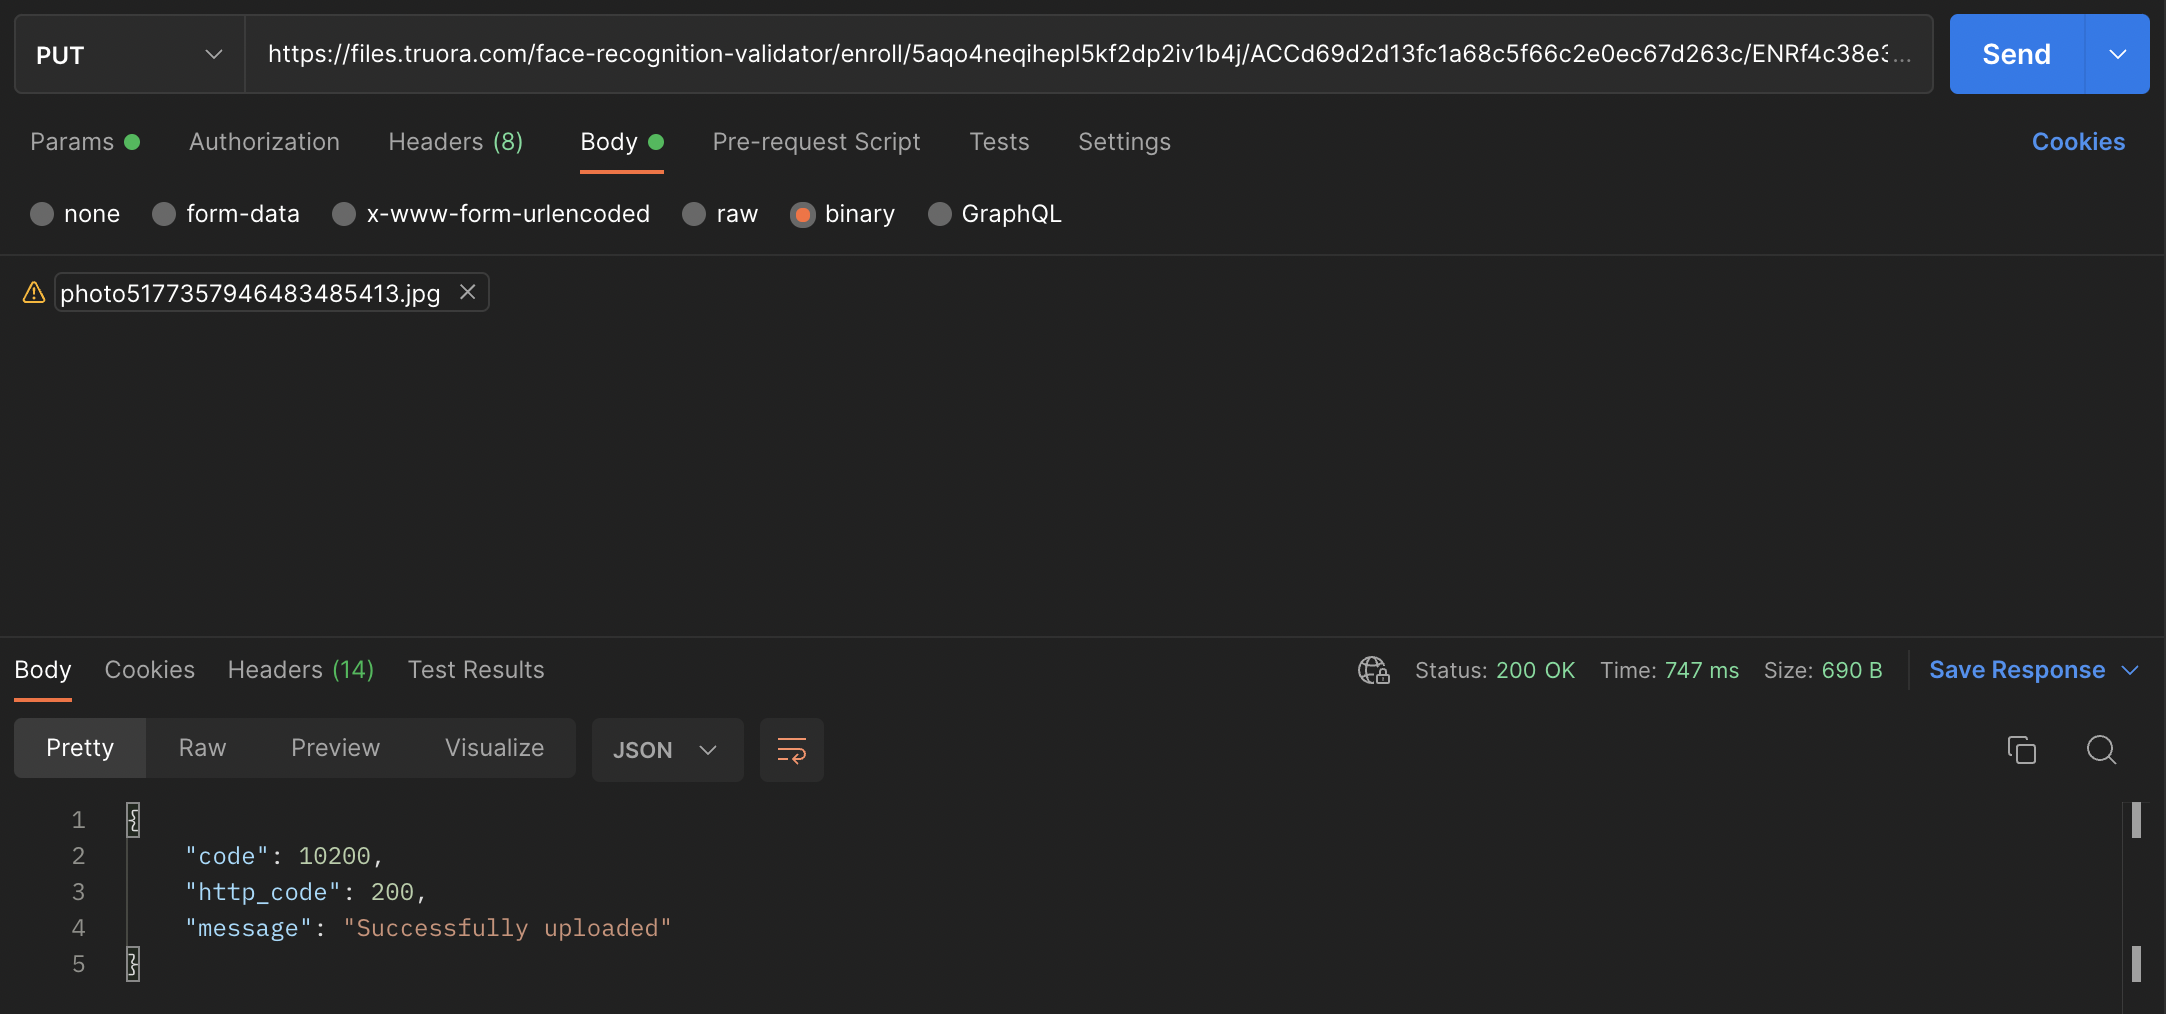
Next, we need to upload the image with the user's face. This should be done using the link given in the 'file_upload_link' field from the enrollment creation response, as depicted in the reference image below:
2. Get enrollment
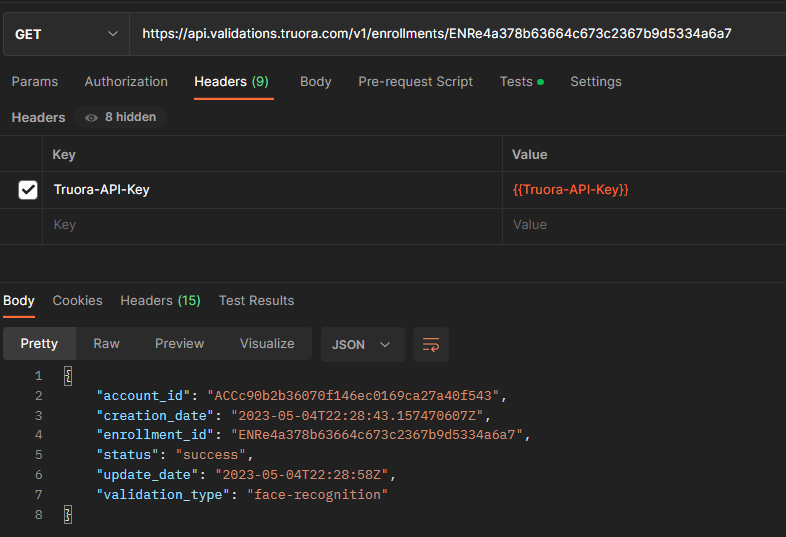
We must now await the processing of the enrolled file. Once processed, the status of the enrollment will be either success or failure. Until processing is complete, the status will remain as pending.
The 'reason' field provides more detailed information regarding the status of the enrollment. The table below delineates the different potential values for this field:
| Status | Reason | Description |
|---|---|---|
pending |
waiting_file_upload |
The file containing the user's face has not yet been uploaded. |
waiting_face_validation |
A face-recognition validation must be performed to confirm the match between the face in the image and the user's face. |
|
success |
The face was successfully associated with the user's account. | |
failure |
no_face_detected |
The system was unable to detect a face within the provided image. |
face_in_blocklist |
The user's face is present in the client's blocklist. | |
file_format_not_supported |
The format of the uploaded image file is not supported. | |
face_validation_failed |
The performed face-recognition validation, which was intended to confirm a match between the face in the image and the user's face, was unsuccessful. |
|
system_error |
An error occurred while processing the enrollment inputs. |
Important: Remember to use the enrollment_id returned from Step 1 (Create an enrollment).
3. Generate a temporary token
Finally, we must generate a temporary token so that your user can perform the face recognition through a web browser using the account API, it is important to define the following field account_id when generating the temporary token as shown in the image below.
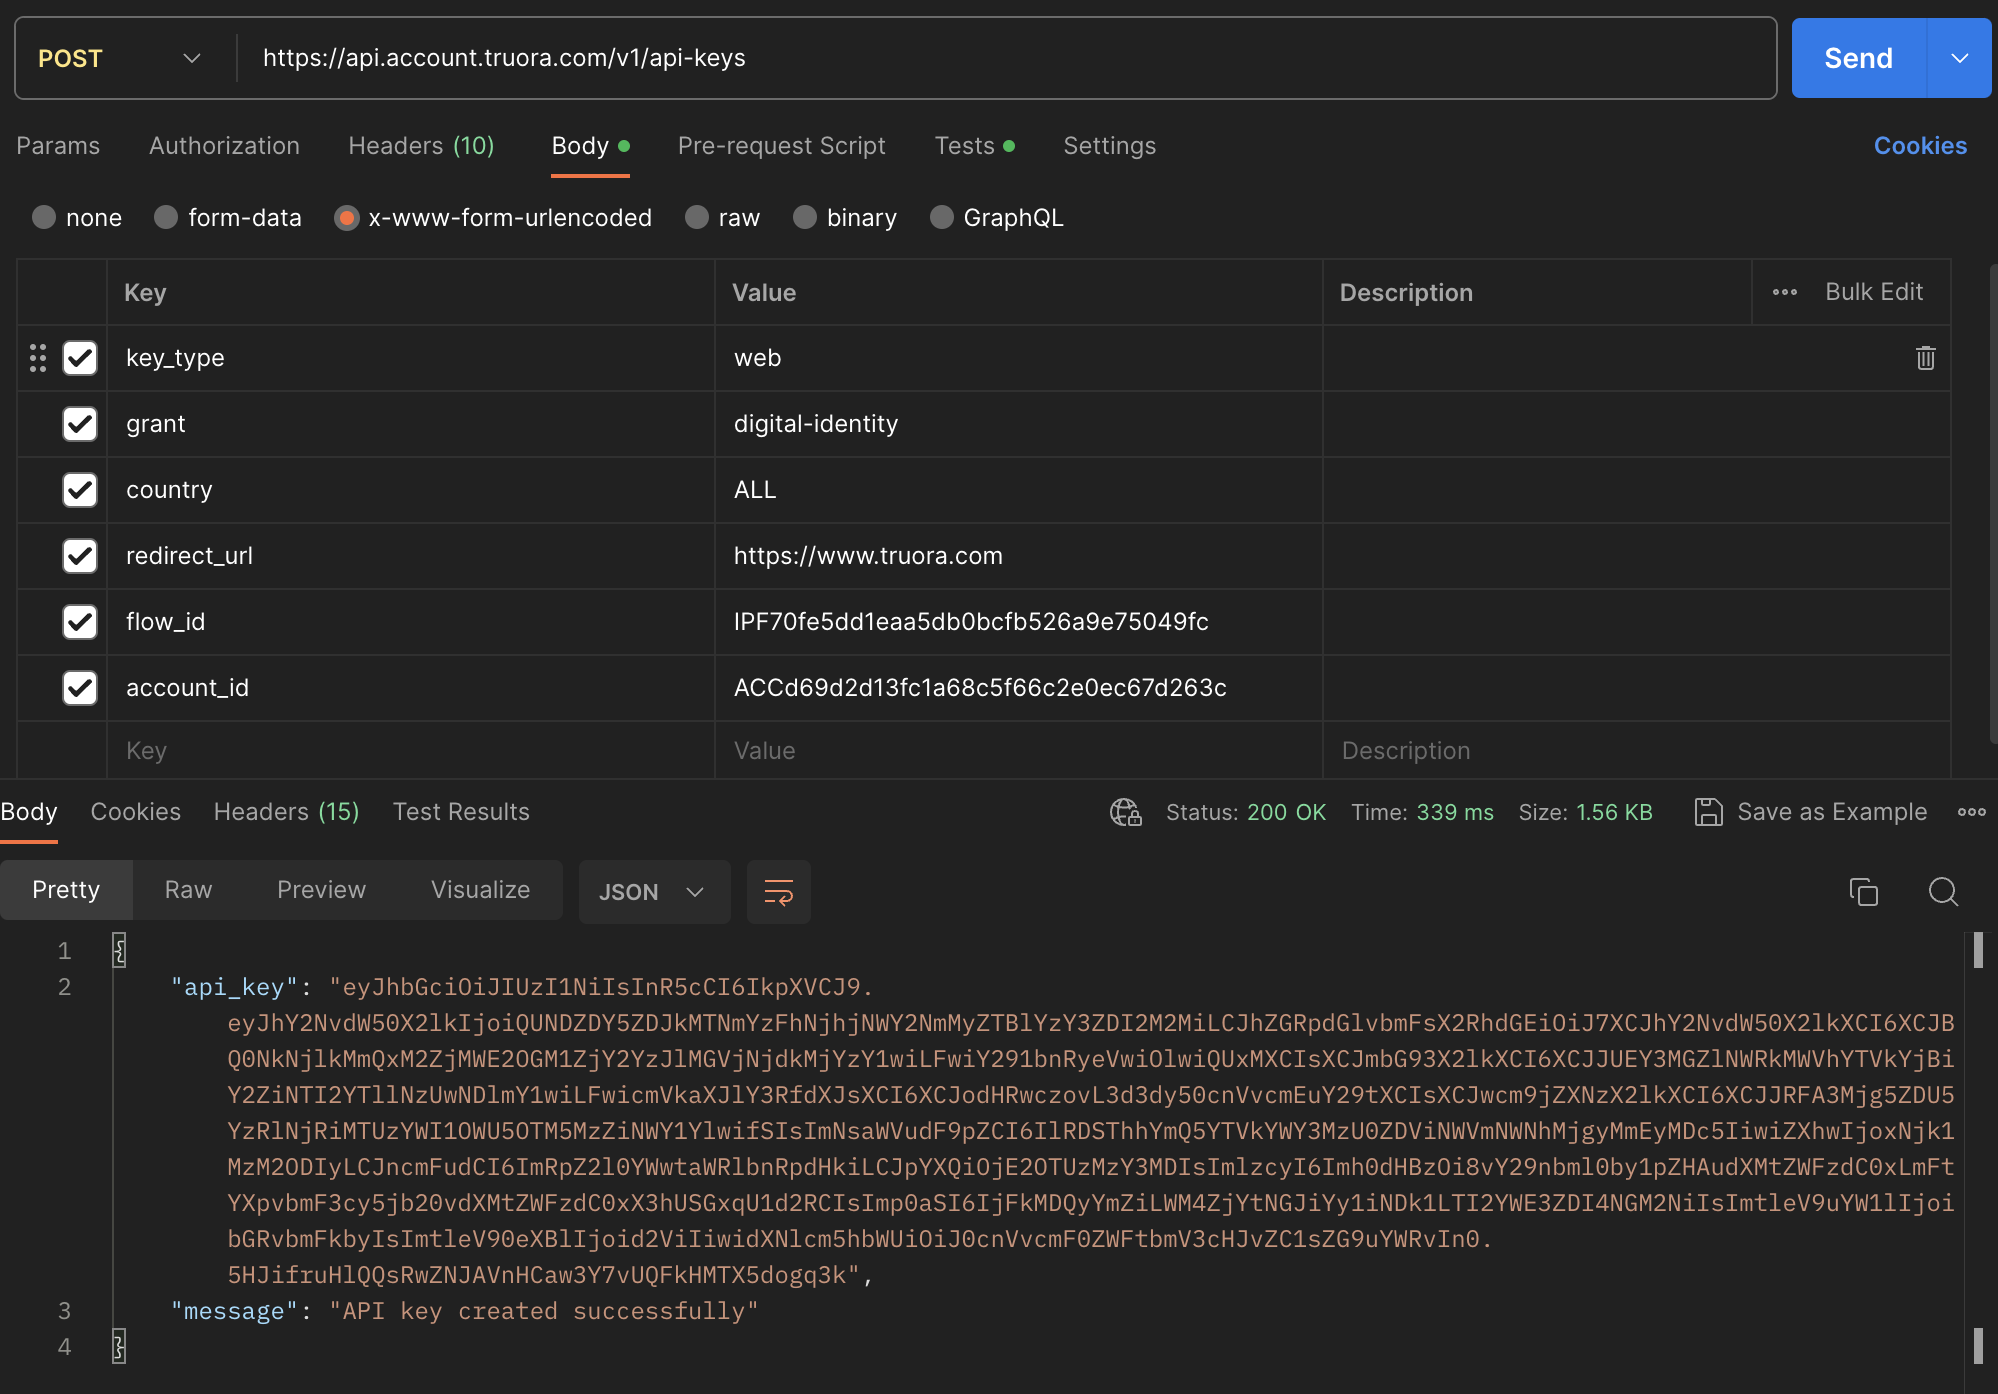
The value of the account_id field must be the account_id generated or assigned in the previous step.
Now your users will be able to verify through the browser using the following URL https://identity.truora.com/?token=<api_key>, the api_key field refers to the token generated in the previous step.
For more information on web verification of users see the Getting Started section in the documentation.